
Making Japonica & Clove jelly on the Aga and a bit of preloved shopping
This week was particularly exciting as I attended one of my favourite preloved seller’s sales, got stuck into bread making with my fabulous new piece of kitchen tech and whipped up a batch of japonica and clove jelly!
AD | This video & description includes products for which there are affiliate links below.
Plus, the AGA is back on! I could honestly not be happier, she is back, serviced and spruced up and already providing us with warmth, delicious meals and drying facilities!
Whilst the AGA was serviced and switched on I took advantage of Sigh being there and popped out to my dear friend Julianna’s home for one of her preloved sales.
Faye was there also selling her wares, and I picked up the most gloriously versatile camel coat that I will get tonnes of wear out of for years to come. Plus a beautiful green autumnal jumper.
Following the sale, we fished for quince! Yes, you read that right, Gus took to our friend’s pond with a net to fish out their fallen quince ready to create some quince jelly. Whilst there we also harvested some japonicas, so I decided to make some japonica and clove jelly!
Scroll down for my recipe.
I also thought I’d show you my favourite new bit of kit for the kitchen, my bread machine. Plus, watch a surprise appearance from Sigh who gives you his critique on the new addition. We’ve already baked loaf upon loaf and they are fantastic, it’s fast becoming my favourite kitchen contraption!
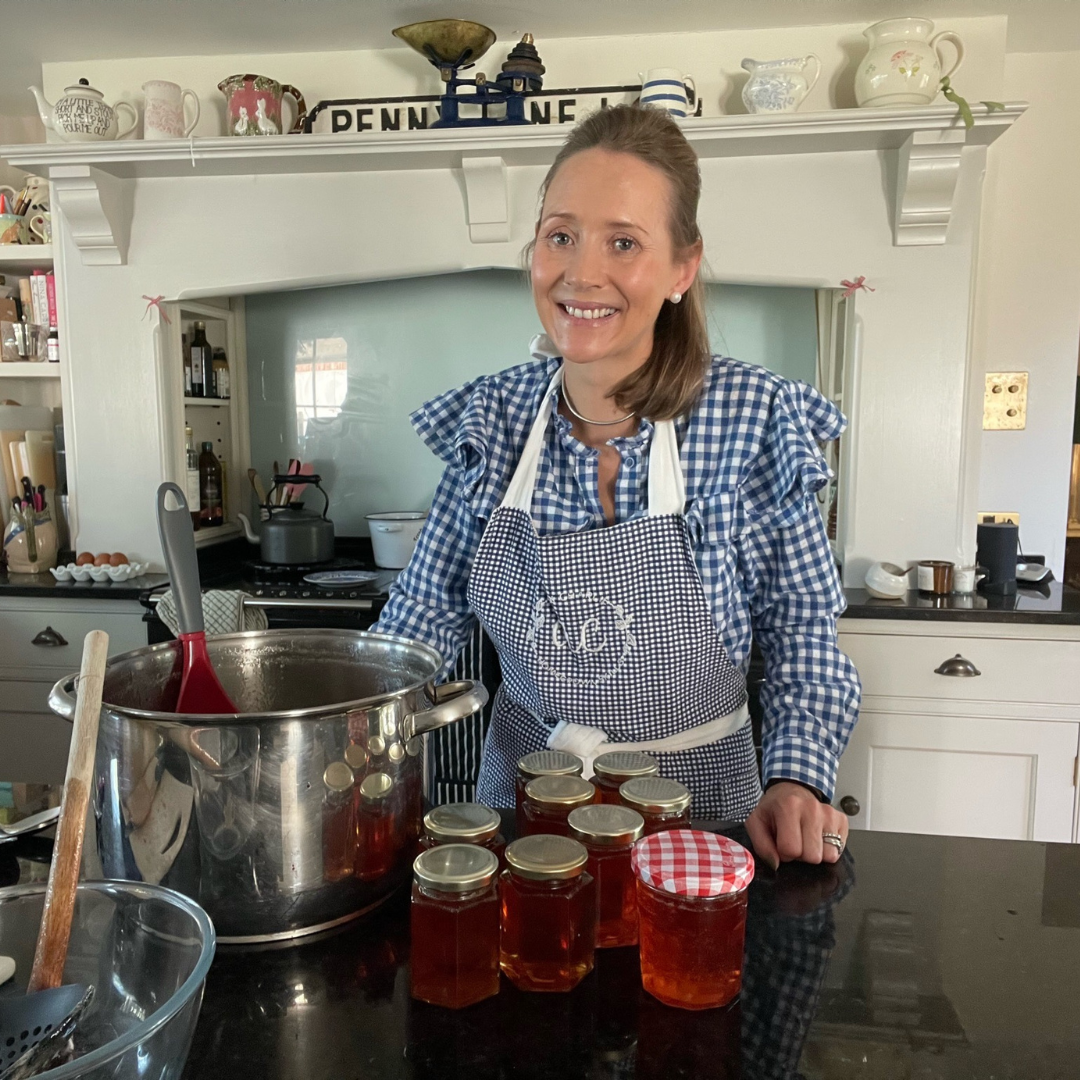
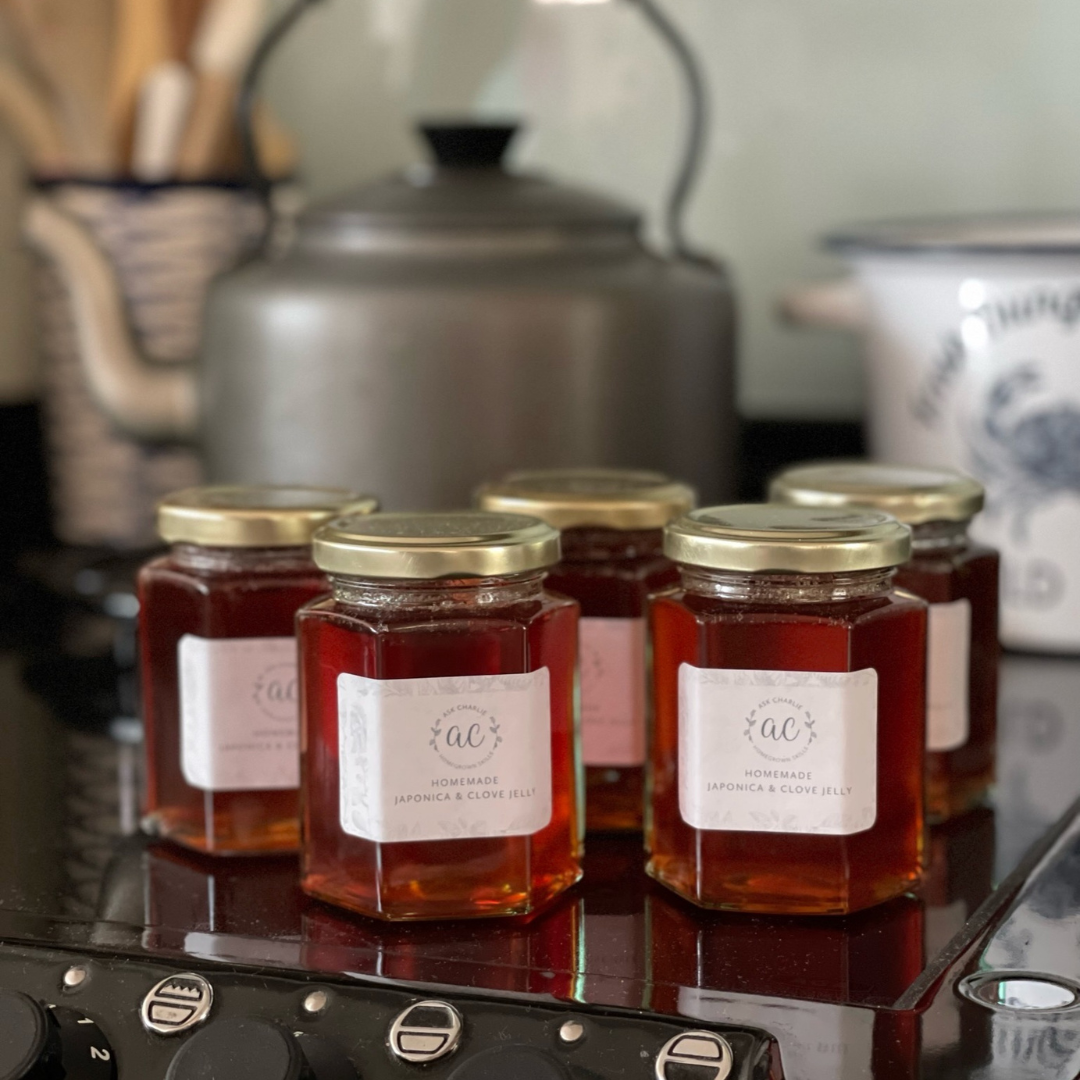


Japonica & Clove Jelly
Using a very sharp knife, chop the japonica into rough chunks. You don’t need to peel or core them.
Place them into a large deep pot with a good handful of cloves.
Cover them with water and bring them to a boil on the hob.
Once boiling, simmer until the fruit has softened. I leave them for at least a couple of hours in the simmering oven of my Aga.
Using a jam strainer over a large bowl, add the japonica, water and clove mixture and allow to drain overnight. You may need two bowls and strainers depending on how many japonicas you managed to harvest!
Once drained, measure the amount of liquid you managed to strain. For every half litre of liquid, you will need to use half a kilo of sugar.
Add the liquid and sugar to a large pan, and put on medium heat to dissolve the sugar slowly.
Once the sugar has completely dissolved, increase the heat to bring it to a rolling boil.
At this point, I pop my jars onto a baking tray and into a hot oven to sterilise.
Place two small plates into the freezer ready for the set test.
Boil the jelly for 10 minutes, then test by adding a small amount to one of the cold plates, popping it back into the freezer for 30 seconds and then running your finger through it. If it wrinkles when you push it with your finger, it’s ready! If not, continue to boil and check again in a few more minutes. Repeat until it wrinkles.
Take off the heat and remove any scum that may have formed on the top using a slotted spoon.
Use a jam funnel to add to your sterilised jars, seal and get ready to enjoy!
Love, Charlie x
Featured:
Julianna Heale / Circle - https://circleboutique.co.uk/pages/about-circle
Fay - https://www.instagram.com/secret_store_pop_up/?hl=en
Shop the vlog:
https://amzn.to/3zGVH4z Jam straining kit
https://amzn.to/3N8XyEu Jam funnel
https://amzn.to/3U2r8O6 Ladle
https://amzn.to/3zeOCHR Jam jars
https://amzn.to/3U2rrIK Bread machine
https://amzn.to/3f6Sowc The Teenage brain book